Google

Friday, June 25, 2021

The Quinault Auto Loop

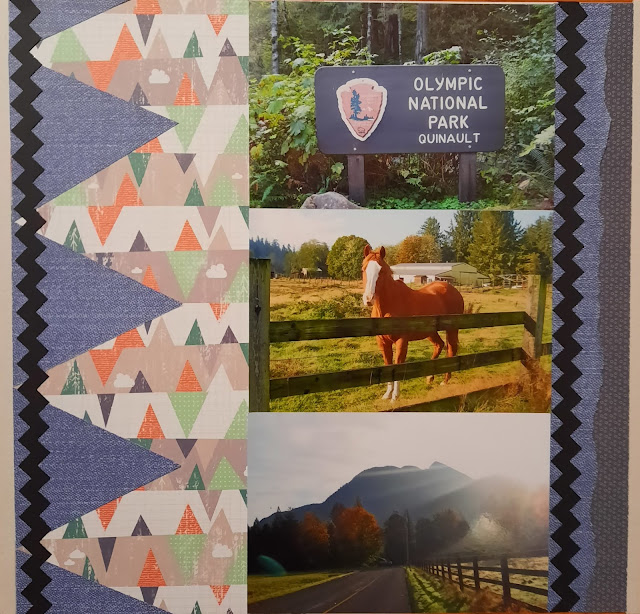
 On Sunday morning I started visiting the Quinault portion of the park in earnest. An auto-loop road started near my hotel so after I checked out, I drove toward the park entrance. On the way, I saw a beautiful sunrise and stopped at the side of the road to take photos. It wasn't very busy along the road. My "friend" came over to the rail near me as I was taking photos and so I snapped one of the horse as well. I think he wanted food but I didn't have anything for him, unfortunately.


While I did create this page during the CM Virtual crop as I had been doing in the last several instances, the inspiration page was much older. For the April 2018 crop, I didn't get all the pages completed so I just saved the sketch. This is my take on the triangles. I used a zig-zag border maker cartridge for the 2 long black strips. The background page with the vertical triangles is from Woodland Whimsy. The blue denim paper is from an old blue-themed paper pack from CM. The journaling is on the next page.


My journey took me across a wooden bridge. Again, since I was nearly the only one exploring, I could stop and take photos. I stopped at one of the nature trail stops for the waterfall photo. It was so peaceful I felt I could stay there for hours. But I had more exploring to do as you'll see next week.


Back to the October 2020 virtual crop, this page is based on Sketch #5. I used some scraps from several packs here including a travel pack. The black buffalo plaid is from the Scenic Route pack. But the rest of the accents and the woodsy paper came from the Explorer pack (which was nearly completed by this time). I used the Custom Cutting System to make the circles. For the green dot paper, it is the inside and outside track of the same circle. Thus I get 3 rings with 2 papers. You can see a bit of the denim paper on this page too which helps tie the left and right pages together.
Friday, June 18, 2021

Inside the lodge

The outside of the lodge was amazing. And then you step inside and it's like going back in time! This lodge has a rustic yet sophisticated feel to it. The bedrooms have old-fashioned claw-foot tubs and the lobby is meant to serve as the communal living room. There was a fire in the fireplace and some extremely comfortable leather chairs. I will definitely return for a longer visit.


This layout is from challenge #6 in the CM Virtual Crop from October 2020. I combined elements from 3 different Creative Memories packs. But the best part of the layout (in my opinion) is the border I used where the 2 background elements meet. This is a branch border punch. I chose it because it had a nature theme to it but also because the branches reminded me of the animal head hanging above the fireplace (and in my sticker). The dark brown cardstock draws the eye to the border. 

I chose to substitute one of the 6x4 photos for a large journaling box. Because I did that, I had to find filler for the bottom left and upper right corners. I chose to fill in with sticker clusters. The bottom left is a signpost I created myself from several sticker pieces. I mounted it on lighter paper so it wouldn't get lost in all the brown of the background paper.

Friday, June 11, 2021

Lodge Front and Back

I made it to my hotel--the Lake Quinault Lodge. It's a historic hotel right on the edge of the National Park boundaries. This is the front of the lodge and the photo below is behind the lodge. I was most impressed with the redwoods near the entrance.


I based this layout on a sketch in the October CM Virtual Crop. I used paper from the Explore pack including some small paper borders from a cut-apart sheet. I liked the woodgrain background because of the tree photos.


In the morning I was up early and was able to go down to the lakeside behind the lodge and grab a few photos. The birds were cooperating with me and I got a few choice shots.


This is sketch #3 from the same CM Virtual Crop. There are a variety of paper and sticker packs here. I group my supplies by theme so I could just browse through my "nature and camping" folder for pieces that would work.  I used a lot of blue tones for the lake feel. The rounded piece is a circle that I cut punched around the edges. I used the Cloud border maker punch without the straight guide. I just free-punched all around the edge. By turning the punch upside-down I was able to match up the edges for a smooth look. 

Friday, June 4, 2021

Water Water Everywhere

 After leaving Hurricane Ridge, I started driving around the park heading to my hotel for the evening. I stopped at 2 additional locations. Though neither of the stamping centers were open, I was able to see more of the diverse landscape of this unusual park. On the left is Crescent lake and on the right is the beach near Kalaloch. Both were along route 101 as I was driving and well worth the stop.


This layout is really 2 individual pages and yet they are connected by colors. I started with the left page and chose the elements based on a challenge in one of my yearly scrapbooking classes. We were given a chart and had to choose 2 different papers (one from each of 2 lists), a technique to incorporate, an add-on, and a word style. I chose: Paper 1: overall washed/textured look (this is the background blue), Paper 2:cardstock (for the mats), 3) technique: fussy cut (I fussy cut the wavy border along the bottom); 4) add-on: journal card; and 5)word style: Die cut words (the "perfect spot" and "spectacular view are from Paper Loft word sheets). Many times when I see those lists it is daunting to find things that relate but this one came together fairly quickly.

I then chose similar tones to have the beach photos match (same family for the background paper, same cardstock mats and same word die cuts). What you probably didn't even notice is that both papers were from a time when Creative Memories had pages that were slightly under 12x12 (for whatever reason they were 12" x 11.5"). They made "perfect fit paper" (of which these papers are examples) but it is sometimes hard to use them on our newer true 12" pages. So I cut strips from the same paper family and filled in the "gutters" along the outer edges. If you look closely you might see where they fit.