Google

Friday, August 11, 2017

Oh the things I will do for a stamp.....

The next set of layouts is from a day spent in Greeley, CO. It was March and I was in Denver for the AORN national convention. I arrived a day early to do some stamp gathering and decided to take a Greyhound bus to Greeley to pick up a Cache la Poudre River National Heritage Area Stamp. Again an affiliated site, but I had few options without a car. My first stop in town was at the museum where the stamp is kept and I walked through all the exhibits.


The opening layout focuses on one of the museum exhibits--a dress made from snake skins. I looked high and low to find a piece of paper that would look something like snake and that became the background. I also had to hunt for snake stickers which surprised me, but I was ultimately successful again. I built the title bar from a piece of contrasting paper so the green snake would not get lost in the details. The right page is more about the city, and I tore a piece of green paper to simulate a grassy slope then accented the upper photos with green mats.

I ended up spending all day in Greeley and walked literally across town. If you look at a Google Map, look for the mall and Meeker House. I walked at least 3 miles. I wish I had been wearing a pedometer. Luckily I could get a bus from the mall back to town.

My second stop of the day is the Meeker house below which is the home of the city's founder. I could not go in but did walk along the grounds. My day lasted a little extra long as the bus to return me to Denver at the end of the day was running late and I spent a few chilly hours waiting outside as there is no proper bus station in town. But, I did end up back in Denver that evening and made it to the conference the next day.


This layout is also wallpaper, and like the snakeskin paper--purposeful. I found the paper in a scrapbook store north of Pittsburgh and knew immediately it would tell the story of walking through town and seeing this historic home. I had to do a little photo adjusting to use only vertical photos but it seemed like my photos knew this ahead of time. I'm quite pleased with how these pages turned out.

Friday, August 4, 2017

Guess who's in Philly again?

If you guessed me, you're right! For my niece's birthday I gave her a certificate for a trip to any National Park with me. She could bring a friend and she also got a souvenir. Sierra chose to go to Independence National Historical Park for New Year's Eve and took her mom. The weather was a bit snowy but we made the trek down successfully. As it is a low visitation time of year you can simply pick up tickets at the visitor center and we essentially walked right onto the next tour. We had time afterward to see the Liberty Bell.


I had bought a piece of 12x12 paper with an image of the Declaration of Independence on it so I thought it the perfect wallpaper for the left side of this layout. On the right I added some decorative stickers but mostly just mounted and framed the photos and memorabilia. I love the patriotic/colonial stickers I found but cannot remember where I got them. That's too bad because I really would like another sheet.

Friday, July 28, 2017

More Than Just a Fort

For my 40th birthday, my parents and Jim and I went to Pittsburgh for a Pirate's game. On Sunday as we left the city, my birthday wish was to visit Fort Necessity. My parents think they either took me there as a child or I went as part of a school trip but I don't really remember going. So, we made a stop! We were in time to see a living history presentation on the life of a soldier at the fort with musket firing demonstration.


For this layout I tried a little creativity and I think I mostly pulled it off. On the left page I used a plain brown border strip and crossed it with the theme paper from the Eastern National pack. Since that paper is 8 1/2 x 11, I must have layered 2 segments but with plain tan blocks holding stickers, it isn't noticeable. This may be a Fast Formula from Creative Memories as the design is very similar to the one I used on the Virgin Island pages.

On the right page the brown border strip is decorated with NPS logos punched from another sheet from the EN pack. I used the Creative Memories Place and Punch with a postage stamp edge so that I could get quite a few blocks to fill the border. A smaller punch was used on the pine cones which is from the same paper. I added a small filler box with some leftover stickers. Brown mats complete the page nicely.

What I didn't know before my visit was that along with the historic aspect of the Fort, the site also commemorates the original highway called the National Road. Stage coaches would regularly stop at a tavern nearby and it has been restored to its original looks.


This layout was a little tricky because there were 2 information sheets I wanted to incorporate and they took up quite a bit of room. I used some of the 8 1/2 x 11 card stock from the EN kit and mounted them sideways. The 1" gap left and right is filled with another set of borders I made with the Creative Memories travel paper and stickers. That left a small gap for journaling next to photos of the building and wagon.

Inside the tavern we listened to a Ranger explain the journey and the purpose of the rooms.


For this layout I again wanted a heritage feel to the pages. I had a sheet of decorative card stock (trimmed as a frame) and cut that in half. I also cut a sheet of floral paper that reminded me of old wall paper in half and sandwiched it on the middle of the pages. A few of my stickers with an "old travel theme" gave a little authenticity to the layout.

Friday, July 21, 2017

Rocky Mountain High

In August 2009, I had to travel to Denver to attend a training session. Jim came along and we spent some extra time seeing the area. Our national park visit was to Rocky Mountain National Park. We started in Estes and drove all the way to the other end of the park, then returned to Denver that night.


The trip generated quite a few pages that are not NPS related, which puts my kick-off page for the park on a right-side page. If you noticed the 6" square technique, congratulations! In fact, this is the same pack I used on the Eisenhower layout. The photo of me at the entrance sign is framed in one of the photo mats from the Eastern National scrapbook kit. The similarities to the photo are striking!


As we drove through the park we decided to try a short hike on the "Tundra Trail". It's in the higher elevation so we needed our coats even though it was a hot August day.

The borders and title block were part of a series I made with the map paper and travel stickers from Creative Memories. I used the green card stock from the border to mat photos and the journal box. The journal box is made from the same Done With One travel page that I used on the Virgin Island pages. I had actually made this several years previously and was waiting to put it on the layout. It actually drove the rest of the page!


In addition to the Mushroom Rocks in the layout above, we saw a yellow bellied marmot and some great flowers. While both of the pages here are wallpaper technique, the results are slightly different. On the left I chose a map/forest theme page which matched the photos well. The National Park sign on the upper right is cut from a page from the Eastern National kit. The camera and film stickers are Creative Memories.

The right page is NOT my photo. It's a 12x12 page paper of a rather twisty mountain road. It was the PERFECT page to tell the story of getting from Rocky Mountain National Park back to Denver. (Because of all the switchbacks, if you looked at the map tracing our car took, it would look like a really bad EKG!) So the only thing I added to the page other than the journal box is a die cut car to enhance the story. I probably should have moved it a little higher on the road so the ratio of car to macadam is appropriate, but it's always one of my favorite layouts.

Friday, July 14, 2017

Once again to Philadelphia

We've arrived at my pages for spring 2009 and even though I feel like I just posted about Philadelphia, it's time for the trip to the city with my students again. This time after we finished the museum and I ate lunch at City Tavern, I walked further south to Gloria Dei Church, also called Old Swede's church. Like the Franklin Memorial, this isn't one of the NPS units--it's an affiliated unit and run in conjunction with Independence National Historical Park. However, since it's the only pictures I took of this visit, I include it here.

This structure is one of the earliest churches built in America and it is still in use. I did take the photos on the outside of the structure and the one of the organ. The view of the main seating area is actually a card I bought while on site.  It's a self-guided tour and I recommend looking through the old graveyard next to the church.


I love the colors I chose on this layout. I don't know that I really matched them to anything in the photos but it just flows. I used 2 sheets of paper and tore them with a wavy tearing tool at about 6 inches. Then I reversed one set of pages and made the 2 complimentary backgrounds. Just enough room for journaling and I didn't really need any more embellishments.

Friday, July 7, 2017

Boston's Freedom Trail

The day after the NPTC convention Jim and I walked the Freedom Trail--a 2 1/2 mile path of history through downtown Boston. It was a good walk and we saw LOTS of great historical buildings. We had to take shelter at one point from a thunderstorm but otherwise had no difficulty getting around. Dedicate an entire day to the event if you attempt it and plan a place for lunch along the route.


Here is my kick-off page for the park. Notice the return of the walking feet! I told you they would be back. I purchased a sheet of stickers from Paper Source that had stickers specifically for Boston and the right border is their sticker of the beginning of the trail. You can see that I also photographed one of the markers. They get a little harder to find as you travel through the city.


The left page of the layout is Boston Commons, the 54th Regiment Memorial (we loved the movie Glory). Not sure if you can see that Colonel Shaw's sword was broken off. That seems to happen frequently. The left border is a design I copied from Creative Memories. The stars page is torn using their tearing tool and then layered on striped paper. Gives a good sense of patriotism. On the right is a burial ground with some very famous people buried in it. In trying to use up the sticker letters, I chose only a B and G sticker then hand wrote the remainder of the word. A good use for random leftover letters! The bottom border on the right is from the Creative Memories Border Maker System. I punched the fence in black to emulate the wrought iron around the burial ground and to give a sense of death for the page. But to keep the patriotic elements, I have a couple more embellishments in the stars and stripes motif.


Our next stops were at the Old South Meeting House and Faneuil Hall.  I hadn't mastered indoor photos at this point so the lovely interior of the Meeting House is actually one that I found online and printed on my home printer. The building exteriors also gave me a challenge and so I had to build them with multiple images.

I created the left border with a Creative Memories short cuts strip adding the punched stars and a small title strip from the Boston sticker pack. Just a simple mat on the very white interior photo and a couple other embellishments finish the page. On the right I feature the photo I made Jim take of me getting a stamp. The stripes on my shirt are echoed in the striped banner on the bottom. The paper and banners came from a new patriotic themed paper pad that Creative Memories produced. There are 2 pages of die cuts to add to the papers.


Further along the trail is the Paul Revere House and the Old North Church. I thought it was perfect to scrapbook them together. For the left border I used the shortcuts that framed the border from the previous layout! I loved how on the bottom it mimics rolling hills so all I needed was a sticker of Paul Revere on his midnight ride. The right border was an old sticker of a brick pathway. Putting the Revere statue sticker at the end reflected our progress along the trail.


My final pages are the Navy Yard and Bunker Hill. We were getting tired so I admit we didn't actually step foot on the Constitution. The sailor was controlling the flow of people onto the ship and I liked his costume. The photo of the ship is also one that I downloaded from the internet as I didn't get a good shot of my own. Interestingly, that photo is much more clear when I photograph the layout than in person. I think it turned out rather dark.

The journal box on the left is from a scrapbook calendar I got for Christmas. It is actually the center of a photo mat. On the right I chose a mat for the Bunker Hill Monument that had fireworks. I thought that would symbolize the finale pretty well. The border is part of a pack I bought that has different colored backgrounds and small white stars printed in white. Matches my blue nautical paper on the left fairly well.

Friday, June 30, 2017

My first NPTC convention

Although I had been on the club message boards for quite a while, I had never attended a convention. For 2008 the location was Lowell in Massachusetts, and I thought Jim and I could take a drive to attend. I received a GPS unit for my birthday and purchased my EZ Pass transponder for the tolls so we were set!

We left Thursday night and drove to a hotel in Connecticut then completed the drive on Friday. We went into Boston first and took a whale watching cruise which was fabulous! On Saturday morning we drove into Lowell to see the park. I loved the trolley at the visitor center. Because it was our first time we didn't really know about all the club events. I could have joined a group taking the trolleys as a tour of the city, but didn't know enough to register for it. Still, we had a good time looking at the various buildings and we had lunch at a nearby restaurant. Jim returned to the hotel and I went to register for the meeting.


On the left page I used  an 8 1/2 x 11 page from the Eastern National scrapbook pack as a giant photo mat for the picture of me at the park sign. I didn't realize when I created the page that I had pulled that paper from the DC pack. Still, you have to look very closely to see the error. With the park unigrid and copies of the passport stamps I got at the meeting, that page filled up quickly. On the right page I found a yellow stripe print that helped bring out the colors of the trolleys. I actually pieced together a couple of scraps to cover the page but you have to look very closely to see it. I matted the photos in white to help them pop from the page.

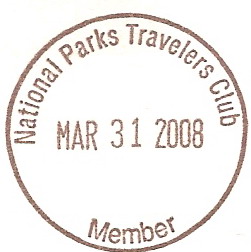
At the meeting, I was greeted by Craig Bailey (I think) who had not only the stamp commemorating this convention, but a new stamp called a "Member Stamp". That's one of the stamps on the page above and it shows me as a member since March 31, 2008.
For some reason I also got a copy dated for the convention, but again I don't really think I knew what I was doing at the time. I was wowed by the meeting. There were speakers from the park and acknowledgement of people who had visited all of the national park units available.


I believe I made the right hand page first and then based the left page off of the color scheme of the right. The right hand page is my interpretation of a page sketch. There are various people and organizations who create sketches. You pick one that matches what you are looking for. Here is the sketch I used for this page. View sketch here. You can see that I went fairly literal on this interpretation, even using circles for the design elements. When you interpret a sketch not only do you get to choose a set of papers to match your photos, you can choose whatever embellishments work for you. I could just as easily have used stars, hexagons, or even stickers there. I also used the sketch in its original direction. You can always tilt the sketch 90 or 180 degrees to make it fit your photos for the layout.

During the meeting, the break was scheduled so that people could walk over to the Boott Cotton Mills to get the stamp available there. I joined a couple of people and took a quick tour before heading back to the meeting.


This became a 1-page layout to finish Lowell. Because it was a vintage set of rooms I chose a paper that reminded me of old-fashioned wall paper. A few sewing notions on the journal box helped with the story of the girls' jobs. Again, all photos were matted in white to help set them apart from the busy background.