Google

Showing posts with label Steamtown National Historic Site. Show all posts

Tuesday, January 2, 2024

Even Smaller than the Dinkie

Happy New Year to everyone and thanks for joining me for another year of National Park Scrapbook page posts! 


The last layout in the series highlights the smaller trains on display this weekend. In one building the local model railroad groups created a large display. Outside, someone brought their personal-sized yard train and in another building, there were Lego train sets. These were of particular importance to my dad and nephews.


This layout is based on one of Noreen Smith's 1-2-3 layouts (July 2017). You can still see the video here. I used a pack of CM paper called "Essentials" which had a foiled dot pattern and some bright colors. They don't say Lego on the pack but you can tell that's what they were thinking when they made the papers. I used 2 different shades of cardstock. I liked the blue but since one set of triangles was the exact same shade, I chose to move those to the right side of the layout and use a green cardstock base. Normally you would flip over and use the back side to decrease the "matchy" problem. But the back was large strips of white and yellow and wouldn't mix too well. I think this turned out fine in the end though.

Friday, December 29, 2023

An Inside Glimpse

We got an inside view of two important rail cars. On the left page below is the standard display at Steamtown. It's an original US Mail railway car. You can see the bins and sorting table inside the car as the postal workers would sort as they moved from town to town. Then we got a chance to ride in a caboose. The quarters were VERY tight and Thomas ended up sitting on the floor. Like the Dinkie train, it was a quick ride out and back, but still fun.


This was a quick layout to put together. I didn't follow any particular sketch. The pages are from the CM Trains collection and feature the photos at the top and bottom and the red/white border. I just had to place the photos between the striped borders, journal a bit, and add the decorative sticker to the right page.

Tuesday, December 26, 2023

It's So Small!

In the museum area, we found a rusted-out version of a small engine called a "Dinkie". This was memorable to me as the intersection just below our house was called the Dinkie when we lived in South Fork, PA. We discovered it was so named because when the area was being mined, the employees boarded a small train there to take them to the mining site. That train was called a Dinkie and the name stuck! In addition to that antique though, was a new and functioning engine and they were giving free rides on it behind the museum. We all piled in for a 5-minute ride out and back.


I based this layout on a sketch I had saved from Even More Scrapping. I always like her sketches because she includes measurements. I chose yellow and red as the main colors based on the photos (especially the old caboose and the Dinkie engineer's bright shirt). For the contrast piece, I used a scrap of the train and tunnel paper (which I think is actually for Disney World's Thunder Mountain ride). I debated the small squares on the layout and then, as I was browsing my punch catalog, realized that the engine and cars from the CM train punch would work perfectly. I had to stack the punched shapes on the left as I didn't think a vertical train would look right, but the overall effect worked for me. I added a couple of other train stickers and die cuts from my stash to finish the layout.

Friday, December 22, 2023

The Ring of Fire

One of my favorite parts of the trip was a walk back to the repair shop. They highlighted the process for replacing wheels which have an inner and outer layer. They heat the outer layer by setting it on fire. This expands the ring and then it is maneuvered over the inner wheel. As the fire is extinguished the metal contracts and seals the 2 pieces together. My dad indicated he does something similar when working with model trains, only using a cigarette lighter, not an acetylene torch! To cap off the experience, the engineer and his guitar-playing sidekick sang the Johnny Cash song "Ring of Fire". Another highlight was seeing "Connie" written on the engine being repaired.


After joining Meggan and Tessa's August 2023 Power Hour, I made this layout. Meggan's layout included all these circles so when I thought about the "Ring" of fire, I knew I needed to put the layout to work. I chose a few photos that could be cut into circles. I continued to use the CM Trains paper pack but added a few other odds and ends from my stash. By finding some papers with photos or small images that would fit the circles, I could make a richer layout. I had cut one photo (the one of me pointing) into 4x4 before realizing it should stay 4x6. I added a piece of punched train track to fill that gap. You'll notice I turned the papers so that the arcs almost complete a circle across the layout instead of a wave as Meggan's layout did. What's your favorite layout you've made? Feel free to comment here or post on my Facebook page.

Tuesday, December 19, 2023

On the Right Track

My nephew Thomas was there, but he doesn't like to be photographed so I had him take the group shots. These are just a few of our group photos through the day and a couple of the engines on display. This weekend is a time for Steamtown to highlight how important rail was in building the US.


I based this layout on a pin I had saved. I moved the tracks to the bottom of the page and then added the red and white striped border stickers to the top. Those are supposed to resemble the arms that hold traffic back when a train is coming to a crossing. I used cardstock as the base and cut some train track paper to cover the middle and act as mats for the photos. The right side includes a trading card I obtained at the site. I mounted that with photo corners so that I could remove it in the future if I like. I had one large die cut remaining from the CM Trains pack. I took a cue from another layout and used it as a journal box by mounting it on some ruled paper. The title is created with letters from a very old Club Scrap pack. Though it was to be a school theme, I mixed the fonts to create a little interest along the pages.

Friday, December 15, 2023

Railfest

My next park visit was in September 2018. Steamtown NHS was hosting its annual Railfest. As my dad is a train fan I suggested we meet there to enjoy the day. The visit included both my nephews and my Mom as well. We had a great day exploring all the extra trains and displays for this event.


This was not a particularly fancy layout. I chose a piece of yellow cardstock for the base and just arranged a couple of photos and the brochure to start these pages in my album. I had my wristband for the day so I put that in a memorabilia pocket. I chose to mount that first on train-themed paper and then attached it to the page. My favorite element on this page though is the use of the train die cut as a journal box. I had an extra set of track stickers and it fit that die cut perfectly! When writing on a dark background I use a white gel writing pen.

Friday, July 16, 2021

The Last Park Visit of the Year

My sister invited us to a New Year's Eve party at Mohegan Sun in the Poconos. We agreed and decided to head up early on the 31st, partly so that I could get in one more park visit. Steamtown was not that far away so we made a brief visit and took a ranger tour that included the workshop area. It was nice to be inside on such a cold day, though you can see we started outside at the roundhouse table.


I made the border on the top left page as part of a class I held for my CM business. The basic cuts could be morphed into a bunch of different borders but I really liked using the train version since I had this page coming up. With the border done all I needed to do was to pick 2 train pages from the CM Trains paper pack. There are some decorations/photos embedded in the papers but with enough blank space to add my photos and memorabilia.


The second layout features more of the workshop area. I loved being able to go beyond the "Unauthorized Personnel Keep Out" barrier.


The left page is a Fast-to-Fabulous page from the Gallivant collection. Since I had "wallpapered" the backside it was easy to incorporate into my album. The left border was printed on the page so I just added my photos and a few extra stickers. On the right, you can see that I added a 6x12 peekaboo pocket. In this photo it's covering up the right page, but without being too obstructive. 


Finally, you can see the right page and the inside of the peekaboo pocket.I pieced together photos to be able to show the entire engine. It was a unique experience to see it "naked". I never realized how many layers went into a structure like that.


The border on the right side was scraplifted from this Creative Memories blog post.  Because of the large photos and brochure, that's about all I needed. For the journaling box, I took a circular embellishment and cut it in half to frame the wording. I wish I had made it a little more even, but it didn't worry me at the time.

Friday, April 13, 2018

Santa and Trains

So, I have a Dad who's been building model railroads since I was little and 2 nephews who love trains. So I thought that taking them to Steamtown would be a great getaway. Beginning the day after Thanksgiving, Steamtown has a holiday train every year and this was our destination.
The first pages in my layout were created during a Creative Memories Advisor challenge one night. It wasn't a sketch, it just asked us to use current materials. I actually hadn't bought much new paper from them but then realized that I had bought the Fast-to-Fabulous Gallivant collection. I leafed through the pages and found these 2 with red borders and a little splash of yellow. That left the middle open for me to play with. I added the photos of arriving at the park sign, the boys in their engineer hats, and the train arriving at the station. They are simply mounted on photo mats which coordinated with the Gallivant pages.

For embellishments, I did have to resort to the Adventure pack which wasn't as current. However, there was a great circle with a train as well as a die-cut train. The die-cut I mounted on a red square because it was looking odd having multiple colors behind it. The wreath on the die-cut was created through punches. CM had an outdoor theme punch with antlers. I punched those in green and added some small red flowers for holly. The last additions were a postcard journal box and our train ride tickets (added with photo corners).

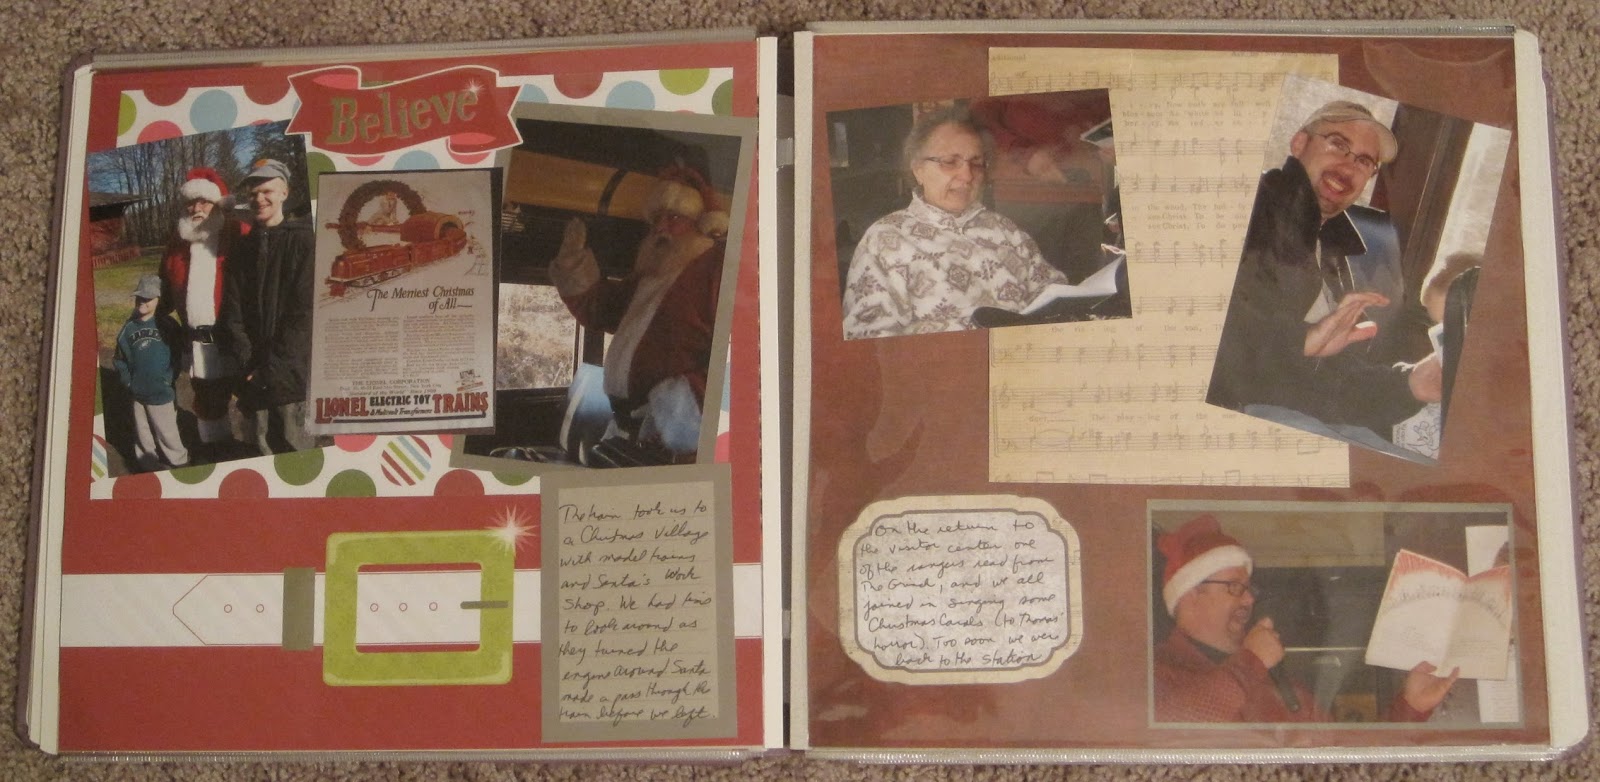
The next set of pages captures the ride and our visit with Santa. There is a tunnel along the route and it became "magic" as the rangers would quickly switch to Christmas theme clothing on the way to Santa's village, and then back to ranger clothing on the return trip. We sang carols and listened to Christmas stories. It was a fun trip.

Of course this layout had to be more "Christmassy", so I used a sheet of older CM paper which has Santa's belt across the bottom. I added a piece of Holidazzle paper as a mat for the 3 photos. The Believe sticker is from a sheet of holiday words. On the right I tried to match the red background, and because of the caroling photos I chose a sheet of paper with music as a large mat for the photos.

After our train ride we continued to explore the site which has many displays of train cars. It's very educational with a cutaway of an engine to explain how steam engines work.

Both of these photos are wallpaper. The one on the left is obvious because the train pattern is so bold. The one on the right has more of a watermark train in the background and that was harder to photograph.

One of the last things we did was watch the trains used for excursions return to the "barn". This involved the center rail rotating to allow engines to go into different bays. It was great to watch the big engines so close!

On the final layout I wanted to use the train die-cut I made on the Cricut that you see on the bottom of the right page. The tracks are an old CM sticker and the die-cut fit perfectly. Because the diecut was in black and red, I chose to use those colors on the rest of the background. I cut card stock into equal widths and layered them along the page. The last item I added was our entry sticker for the day which I had preserved on a piece of paper in my National Parks Passport. We spent the entire day there and had a great time.