Google

Friday, December 1, 2017

Northwest Adventure part 8--end of the cruise

Our last shore stop was in Ketchikan. Ironically, Ketchikan is the rainiest spot in Alaska but the weather was beautiful for us.
On the left page is a border I made with Creative Memories paper and stickers. It's busy, but I like the combination. Also on the left is a punch art sun made with the Creative Memories paisley punch. I put 5 of them together for the rays, and then punched a circle for the sun in the middle. I really wanted to highlight the good weather! I think I might have needed a 6th ray because it also looks a bit like a starfish. Yellow matting for the photo helps tie the page together. On the right is a Fast to Fabulous page. With cropping and layering of the photos I was able to piece together the multiple sides of the statue in the round.

Also in the area just off the ship was the "liquid Sunshine" gauge. This includes snow as well as rain and last year they had over 100".  We walked through the city, but one of my planned stops was the Southeast Alaska Discovery Center. This is another part of the Tongass National forest so I got more bonus stamps. There were some good displays to view as well.
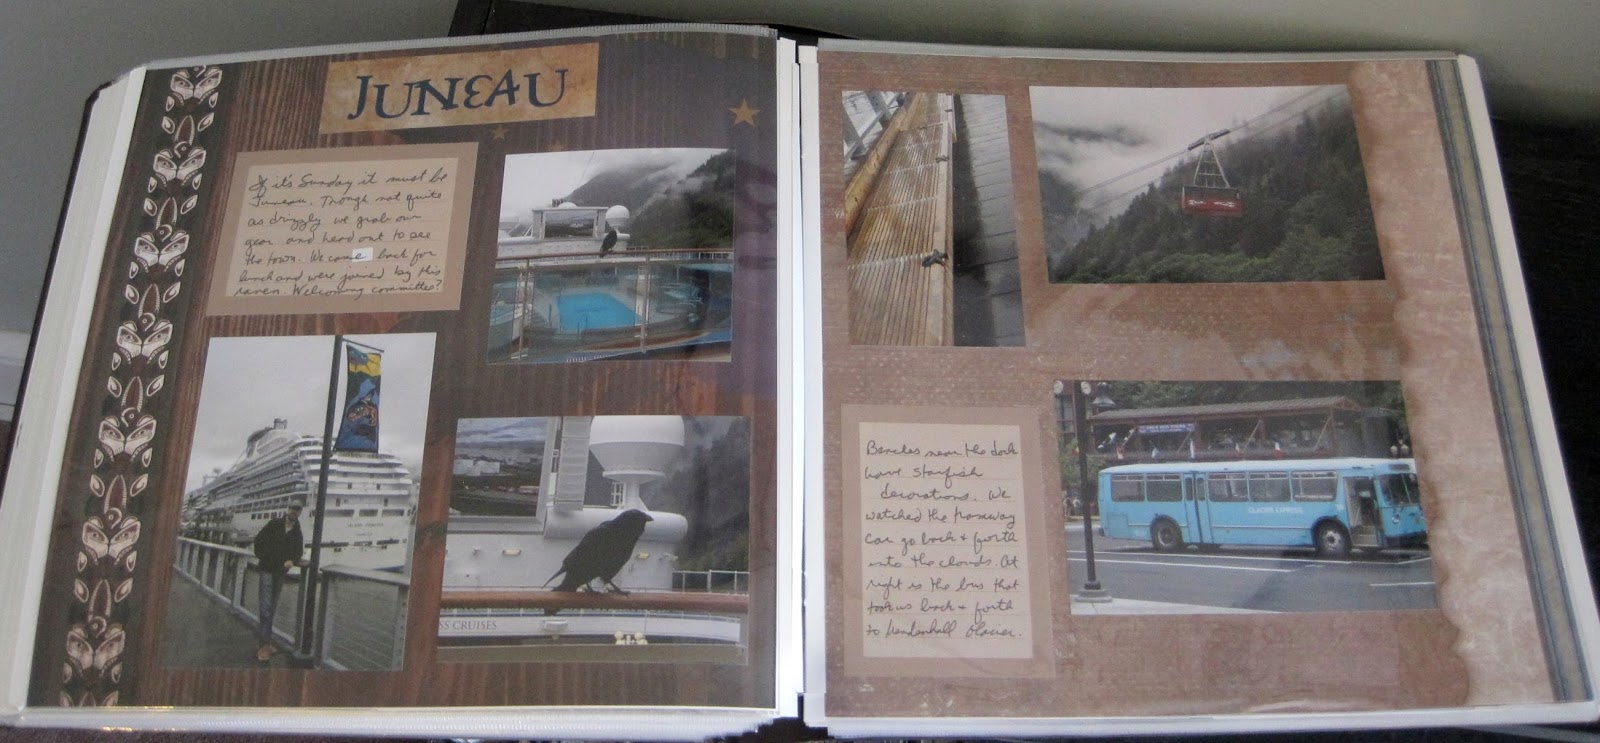
I kept these pages very plain. There is a background wall paper for both which was a little darker than the traditional pages. I again added a sticker of the sun and the photography sign. Really, the page is all about the photos and journaling. Well, not every page has to be a masterpiece.

Our plan for the day was just to walk around the town and our next stop was the Creek Street area which was the business district (and in those days was the red light district). I loved that everyone was fishing from the bridge. I'm not sure how the lines don't get crossed. The right page features photos of a salmon statue and though it's a replacement, it's really quite lovely.
On the left page I used more of the paper from my Scrapbooking Page a Day calendar. It's funny that when I originally went through the slips I thought "When am I going to use the fishing pages?" And then you come across people fishing and it just works! So the bottom right mat with the fish corners is a page from the calendar. In the space under the photo were a couple of clip art photos--one of which I used on the bottom left. The title is a simple strip of blue cardstock with a decorative circle in the middle and a second layer of creels and bobs to highlight the fishing theme. The journal box is a piece of journal paper with a couple of stickers across the bottom.

On the right I used a piece of Creative Memories' Enchanted paper. The blue diamond paper really reminded me of the scales on the statue and I thought it a perfect match. I apparently had used a portion of that page before so the gap at the top is filled with another frame from the calendar and a green journal  box. 

We saw quite a lot when walking around town and I wanted to capture all the various pieces of the trip. Look at the staircase on the right page--would you like to climb up and down that every day to get home!?! Sometimes we saw wildlife, sometimes we saw strange shops like the whale popcorn place. It made it a little difficult to put it all together cohesively but I think this worked.
These 2 pages are also from the pre-designed picfolio pack and again, I'm using them as they are meant to be! Since the left page ended up being about totem poles, I added the sticker from an Alaskan Scrapbook kit I picked up. The eagle sticker on the right is similar to all the bear stickers. We hung out in various locations (like near a fishing boat launch) to try to get photos of bears and eagles and got NOTHING. Still, for us the day spent doing nothing was quite something!

Below are the layouts for the end of the cruise. There was still a days worth of travel before reaching Vancouver and the ship held some contests as a sort of boat carnival. We ended with a grand dinner and then transitioned back to our land portion of the trip. 
On the left is another cruise page I bought. i added the circle for "Fun at Sea" and that's all the page required. On the right I made a wave border with the Creative Memories border maker system to carry the water theme from the left across the layout. The journal box was actually part of the set made with the border seen in the post at the beginning of the trip with the champagne fountain. The top border is from one of the cruise pages. On the back of that border is the bar code so that when checking out the store can scan it easily. Some companies are thoughtfully printing a contrasting or border design on the other side so it isn't wasted. I used one here with a small sticker as a combination title and decoration.

This is the last page of the album. I always have problems figuring out how to end an album, especially a theme album. Some people make decorative pages much like my kick off page. This time, the club had a group photo taken and I chose the 8x10 photo as my ending page. 
This is one more of the picfolio pre-designed pages and it seems made to highlight a large photo. The title stickers had to be blended though I tried my darndest to get all one shade. Still it is all the same font and I didn't have to manufacture letters. Now it's time to get to the land tour. We took a bus from Vancouver back to Washington state and our adventure keeps going!

Friday, November 24, 2017

Northwest Adventure part 7--State Capitol Tour

It's Black Friday! I hope you all found some great scrapbook deals if you were out shopping. Or did you stay home to scrap? Share something you made today in the comments!

In addition to National Park passport stamps, I also collect stamps for the state capitols and lighthouses. Because we were to be in Juneau I could not pass up the opportunity to get this capitol stamp and arranged an unofficial club gathering (unofficial because it has nothing to do with National Parks). It is one of the few capitol buildings without a dome! Still, I was joined by about 10 other people as we toured the building. I loved that all of us stood in the same spot to get a photo of the building.


This page includes a set of borders that I made with Creative Memories travel stickers and map paper. I added the shore excursion sticker on the bottom left to give some symmetry to the page. I'm thinking now that I should have set off the brochure and photo a bit--perhaps with some blue mats.

Inside the building we meet our tour guide and got the stamp. The building is all inclusive--governor's office and both chambers. They've grown somewhat since the original legislature was formed so some rooms have different uses.


The 2 pages above are from a kit I got as a present. Each is actually 2 pieces of paper arranged so that there is matting in the pre-formed openings. I had a devil of a time trying to fit my photos into the spaces but managed with twisting and turning the pages to find something that works. I was able to augment the openings with a few cropped photos and stickers as well as a journaling box.

Alaska has not been a state long but still has a much longer history of people who have lived here and influenced styles. Russian art as well as Scandinavian influences are easily seen which is surprising for a building with such a boring facade. During the tour we also learned about the formation of the state flag (below right).


The left page is a pre-designed paper and I thought the decoration lent itself well to the photos of the hallways and chambers. On the right I focused on some of the more ornate rooms and wanted to use the Creative Memories Reminisce Travel additions. I also used a sketch for this page (Sketch is here). You'll notice I turned the sketch sideways and expanded the size of the paper mats quite a bit. I used quite ornate paper and so some of the photos had to be matted so they didn't clash with the background. It took a good long time to match those 3 papers but I like the way they look together. I'd love to see your take on a sketch. Feel free to post a comment with an example below!


Friday, November 17, 2017

Northwest Adventure part 6--Mendenhall Glacier

Our next stop on the cruise was Juneau. The closest thing to a National Park here is the Mendenhall Glacier which is part of the Tongass National Forest. This is a huge area comprising just about all of the southern parts of the Alaskan tail. In National Park Traveler Club terms, the location is a "bonus" stamp location, but I put it on our things to do for the day.


In the layout above, the left page is wall paper, though I added the Juneau title (which is again a combination of stickers to spell out the word--not too shabby this time). I liked the totem pole on the left and thought that it matched my impression of the town. The right page is another of the pre-made pages from the picfolio travel bundle. I chose it to match the browns on the left. The journal box should probably have been a different shade as it gets lost on the page, but there is enough color on the photos to make them pop.

Once at the visitor center, we took a nature trail because there was the possibility of seeing bears. I think it is something Jim really wants to see given our disappointment on the Appalachian Trail, but sadly the warnings were wrong and we didn't see anything.

Both of the backgrounds are from the picfolio kit. And I think for the first time I actually used the pages as intended--matched and facing each other. The wristband is in a handmade protection envelope. I didn't have anything in the correct size so I used one of Creative Memories photo sleeves and trimmed it to the right size and shape. The adhesive is cleverly hidden behind the wristband, but you can always include a background piece of paper if you need additional disguises.

Once at the glacier, I came across a group of NPTC folks walking toward me and grabbed one of my favorite shots ever. It's very "Reservoir Dog" in a good way. 

The left page above is a piece of paper from an old kit by Creative Memories and was made when their pages were not quite true 12x12. I believe they were 12x11.5 or something similar. Because of that I tend to need 2 pages and add a small strip of matching paper to one side to fill in the page. This set is actually 2 remnants stitched together. I liked the natural border they inserted. By adding a piece of vellum, it softens the background a bit and helps the title stand out a bit more. When putting vellum on a page, make sure your adhesive will disappear behind it. Most companies make something specifically for vellum so that it doesn't detract from the page. You can also use decorative stickers at the corners to adhere a block.

The right hand page is a Fast-to-Fabulous page. Notice I was able to trim my photos a bit and put more than just 2 on the page. When looking at a photo, eliminate random body parts of people from the edges and massive amounts of sky or sand and you'll find that trimming often improves the photo. 

Our visit to the glacier ended at the visitor center (which is sort of backwards from my normal pattern). I thought the photo of the building quite nice. Of course if there is a display that says "touch me" I'm going to do so! Getting to touch glacier ice was a big treat, especially being able to do it indoors where it is a bit warmer and a LOT drier.
This is another picfolio pre-designed page. I augmented it with the pre-designed journal card made for a winter theme given the glacier ice in the photo. I matted the building photo to make it pop a bit. I've noticed with the picfolio pages I don't feel the need to put a lot of stickers on as the pattern fills any "dead space".

Friday, November 10, 2017

Northwest Adventure part 5--Skagway

Our next port of call was actual land! Skagway is the home of one of our host parks and we had a presentation of the iconic stamper, as well as several tours of the area. Our first tour was to the start of the gold fields. The rest of our group took a railroad trip to the Canadian part of the gold rush trail, but we chose a van tour (partly because I wanted a photo of the Alaska state sign).


The left page was my take on this idea Corner Rounder idea page). Somehow my cuts don't QUITE match up the way the sample does. (I know, I'm probably the only one who can see the errors). The right page is a Fast to Fabulous page. Since we took a van tour the road sign was the perfect accent. I added the words from a sticker in my stash, but it looks like it was always part of the page.

After our tour we opted to be dropped in town. Our convention host is Klondike Gold Rush which is actually comprised of 2 different locations--the one in Skagway, Alaska where people started their trek to the gold fields and the one in Seattle, Washington where they boarded boats for the trip to Skagway. By taking the cruise we were able to visit both halves of the unit which is somewhat rare.

On the left is actually a wallpaper technique. The page is from Creative Memories' Discover paper pack. I like how rustic it is and it is one paper with a patchwork design so I don't have to paper piece. It was a good choice for the building covered in driftwood. On the right is another Fast 2 Fabulous page. The blue backdrop helps link our convention shirts to the page. 

After we presented the iconic stamper to the Skagway part of the unit, we broke into a couple of groups for a tour of the city and National Park areas. My favorite photo is on the left page. So many people ask me if that is my husband Jim! (It's not, it's just a mannequin that looks like him). We started with the museum next door which covers what someone would need to take with them to the mining fields. It took over 10 trips up and down the mountain to haul everything.

This layout is part of a class I took with Paper Loft (https://paperloft.com/). I found a scrapbook convention in Lancaster and took this class because they make layouts with paper and not a bunch of wood, bling and other 3D materials which make my books bulky and can put dents in my photos. I love their paper--great designs and they make coordinating sets so you know that the various prints will look good together. 

As we moved through the city we got SOAKED in the rain. It turns out the jacket I brought wasn't actually water proof even though it felt like it should be. We saw several historic buildings--people who helped the miners to prepare or came to mine but found out the real money was in selling supplies.

The entire layout is also a wallpaper technique. Like the winding road photo in my Rocky Mountain layout, the left page picture of a log cabin is actually 12x12 pre-designed paper but matched really well with one of the log cabins used by an early settler. Next door is their richly decorated house that they moved into with their profits. The paper I chose for that page was from the Creative Memories Reminisce Travel pack. I love the gold tones that swirl through the page.

After touring the town we took a van tour out to the start of the Chilkoot trail--Dyea. The town has been nearly swallowed back into the forest in less than a hundred years. And it's still raining.

This is another layout from Paper Loft (though made in a different year). Look closely--there's footprints! (It's been a while but I told you there would be more!) Unlike my other pages though, this was actually a print from the Paper Loft paper that we cut and strategically placed across the page split. I'm glad when I can use a premade layout from my stash. If you don't take a class, make sure that when you buy paper you buy a few of their cut apart sheets with the phrases and pictures. It helps make a complete layout.

Friday, November 3, 2017

Northwest Adventure Part 4--Cruising Glacier Bay

On day 2 of our cruise we entered Glacier Bay. I was delighted that Princess Cruises works with the National Park Service and has rangers come on board. There was a ranger talk in the theater and then later the rangers narrated our trip over the loud speakers as we approached various glaciers. They brought a lot of materials with them and one sign was a great stand in for the Visitor Center sign photo I usually take. The white square of paper is something the rangers bring--probably because they don't expect people to have the National Park Passport with them and this gives them a place to stamp. Of course my group all had our passports but we took these as well.


I'm interposing material between the pages of my layout again, though instead of eliminating it, I'm actually showing the newsletter and the brochure that they provided about Glacier Bay. Above, the left page is another page from the picfolio travel album kit. It eerily mimics the cover of the unigrid doesn't it? As noted in a previous post, the Princess Patter is in a protective 8 1/2 x 11 photo sleeve from the early Creative Memories years.


You can see the edges of the sleeves pretty well in the above photo. An additional piece of memorabilia is the information sheet specifically about Glacier Bay.


The right hand side of the layout is a Fast to Fabulous page with a bunch of post marks on the paper. Sort of mimics the passport stamp even though that's now covered up with the brochures. The photos are of the ranger talk in the ship's auditorium. I photographed our bunch of club members as we all hung together. A couple of stickers from the NPS scrapbook kit adds to the journal box. One other piece of memorabilia is a little note from the rangers welcoming our group. Nice to be noticed!


Now we move into the cruise through the bay. Sorry that this photo is blurry. I didn't realize it until after the album was packed away. (I will be happy to be moved and unpacked!) On the left page I used another pre-made picfolio page but I did add a few stickers along the blue strip to give the page a little character. The right page is another paper bought specifically for this book and other than our weather was more dreary, it was spot on!


The cruising took all day, so after we spent some time out in the drizzle and cold we decided to have lunch. The left page reflects our Alaskan themed food again. I used a sketch to create the layout (click here to see the sketch). I like that it gave me a good chance to use up some scraps. Then I was able to use similar scraps on the right to create a background for our pre-dinner preparations (alternately relaxing and looking out the window).


The last 2 pages are from our last foray out of doors. As we neared the main glacier we returned to the deck and I squeezed my lens between the protective plexiglass so I could get some unobstructed views. I still cannot believe how close we got. This is another picfolio page with the addition of a camera sticker from the kit as well. On the right is a set of borders I made with an old die cut (use silver shimmer cardstock to highlight the lens and flash) and travel themed paper. This page is all about those out taking photos so I thought the camera appropriate to the layout. One thing about Alaskan photos, the stark blues really reduce the need for photo mats!

OK, this last layout has nothing to do with the National Park, but after dinner we went to one of the lounges and several of our friends were put in a hula hoop contest. The results were hilarious and one of our friends actually won! I just add it here because it gives me a chance to wax poetic about the Cricut.


All of the decorations on this page were cut with the Cricut (formal affairs cartridge believe it or not). I think I actually cut the records backwards but it still works! I love the detail you can get on the die cuts and being able to layer them adds a nice bit of color and texture you can't get with the old-fashioned diecuts.


Friday, October 27, 2017

Northwest Adventure part 3--Smooth Sailing

Here's where we stretch the imagination of "National Park" scrapbooking. These pages are about our first couple of days on the ship and the closest we get to a park is our club meeting in one of the lounges.

These 2 pages are laser cut layouts which I bought for the album. They came with the blue background which I'm not sure was anything more than filler paper, but it did make a nice background. The only thing I don't like about these types of pages are the pre-measured blocks. My photos never seem to fit so as on the left, I just covered them up willy nilly. On the right I used a variety of stickers to fill in most of the little squares making a type of border. Two of them became journaling blocks as well. The whole point of this layout, I have to confess, is the photo on the right. I had seen something like that on Pinterest and just had to copy it and I was bound and determined to get it into the album. Big thanks to my hubby for participating in the photo op!


So here's the club meeting on the left. It's a very simple background paper with a sticker border on top. I used the red in Nancy's shirt to pick a color for the journal box. We had a great time at the meeting even if we weren't the ones to win a free cruise! On the right is another Fast to Fabulous page. I liked the Good Eats theme and used it to highlight the lunch with somewhat unusual food (reindeer chili!). Look, I remembered to layer the photos!


And lastly is a gratuitous look at formal night. There was a special display of champagne flutes and they poured many bottles over them to fill the tower. They also passed glasses around. We were encouraged to have our photo taken and I definitely wanted to try that. We can't actually hold the bottle, just the maitre' d's arm, but it was still fun!

On the left is a border I made with the Creative Memories Cruise stickers. The black banner is slightly wavy and trimmed by hand to have the triangle ends. On top are 3 double mounted squares and then the stickers. On the right is a champagne bottle I found in the Cricut library. I added a few streamers for the party feel and the pages were done!


Friday, October 20, 2017

Northwest Adventure part 2--Anchored down in Anchorage

Our cruise ship left from Anchorage--though in reality the port is just a few miles further inland in Whittier. So we flew in the day before and stayed in a hotel overnight. I was still up early even with the time difference so I decided to go downtown and see the sights. And if I was lucky I would find the newly made Iditarod Trail stamp our NPTC group presented the day previously.


In town I found a variety of things to temp my camera--sign posts, murals and interesting food (street cart is selling reindeer hot dogs). I was able to use 2 more of the Fast to Fabulous pages here. You can see that by cropping I was able to keep the essence of the photo of the sign but add another photo to the page. The pre-planned photo boxes were perfect for the pictures I took and left me room to journal along the side.


On the left is the grass-roofed visitor center. On the right is the loose National Park affiliation, the Iditarod National Historic Trail. It is technically run by the Bureau of Land Management, not the National Park Service, but they do participate in the Eastern National Passport program. There are statues in town and I took a taxi out to the BLM office for the stamps.

These 2 pages were part of the pre-assembled vacation packet I bought and I thought these 2 went together nicely. It does save time when putting pages together. I started this album at a weekend scrapbook retreat and one of the other ladies commented on how quickly my album came together.


Soon it was time to take our bus over to Whittier to board the ship. As we drove we passed part of Kenai Mountains National Heritage Area at Turnagain Arms inlet. Our driver allowed us time to exit and take a few photos. The glacier was on the other side of the road from the inlet.

I bought the left page for the trip and thought this was a good place to indicate a "starting point" with our bus photos. The photo box became a nice journaling box. On the right is another pre-designed page from the kit. The brown allows the blue of mountains and glaciers to be seen without too much matting. The yellow note on the right was cut from one of the tourist guides. I didn't want to include the entire thing, but this note about tidal flats was perfect. Don't be afraid to cut up brochures to get to what is important.


The last set of pages covers our trip to the cruise ship. The bus had to traverse a 5-mile tunnel which only moves in one direction and takes either cars or trains, but not both. That means there is usually a significant wait to get in there, but once through we were able to see our ship. A train waited at a siding and I took a photo of it which spurred the use of the borders for the page. I had pre-made these and had been waiting for a good chance to use them. The bottom is wavy cut paper with the Creative Memories 12" trimmer with wavy blade. on top are stickers from the old Cabana travel kit. Then the train and vellum saying were double matted and attached at either end.

The right page has 2 pockets. One holds our cruise cards, the other holds the notice of gifts we found inside the cabin. In addition to the hors d'oeuvres and petit fours we were given travel mugs. In lieu of putting something very bulky in the page I took a photo of the door hanger made for everyone in the club on the trip. It was easy to identify where people were when I had to deliver notes to staterooms during the trip. Unfortunately by the end of the trip the bells were pretty flat from being crushed in the doors accidentally. When you don't want to damage your book, remember to take a photo of an object so you can still scrapbook the memory!